Most people buy nursery plants for a quick harvest, but growing strawberries from seeds is an entirely different experience. It’s slower, yes—but deeply rewarding. Imagine holding a seed smaller than a grain of sand and watching it grow into a lush plant that produces bowls of fresh berries.
I first tried it when a friend in Canada gifted me a pack of alpine strawberry seeds. They took their time, but once the first sprouts appeared, the excitement was unmatched. And the flavor? Tiny fruits bursting with sweetness—better than anything store-bought.
When you grow from seed, you also gain freedom. You can grow any variety from seed—from alpine to June-bearing or day-neutral—giving you more choices than the limited nursery options.
Tools Needed Before You Begin
Before planting, make sure you have the tools needed. Growing strawberries doesn’t require fancy gadgets, but having the right basics ensures success.
Tools Needed |
Purpose |
Seed or plug trays |
To start by sowing seeds indoors in seed or plug trays during the fall |
Spray bottle |
Gentle watering without disturbing seeds |
Heat mat |
Keeps soil at a consistent, warm temperature |
Grow lights |
Provides extra light in short fall days |
Fine potting mix |
Light base to support germination |
Once you gather these, you’re ready to start your strawberry journey.
Step 1: Start Indoors in Fall
The safest way is to start by sowing seeds indoors in seed or plug trays during the fall. This allows seedlings enough time to develop strong roots before spring.
Here’s how:
- Fill trays with a fine-textured potting mix.
- Sprinkle seeds on top—don’t bury them, as they need light to germinate.
- Mist gently with a spray bottle to keep the soil moist.
- Cover with plastic wrap or a humidity dome to maintain moisture.
Patience is key here. Strawberries can take 2–4 weeks to sprout, but every new green sprout feels like a tiny victory.
Also Read: Propagate Your ZZ Plant Like a Pro
Step 2: Soil Choice Makes the Difference
Strawberry seeds are delicate, and their first roots need air circulation. That’s why loose and well drained soil is best for germinating seeds. Dense soil suffocates them, while airy soil helps strong roots develop.
Pro tip: Mix potting soil with perlite, vermiculite, or coarse sand. This ensures moisture doesn’t get trapped and keeps fungal problems away. In my own trials, using a fluffy mix doubled the germination rate compared to heavy soil.
Step 3: Care During Germination
Once the trays are set up, place them in a warm, bright location. If you’re in northern regions like Canada or colder parts of the USA, use grow lights for 12–14 hours daily.
Keep the soil evenly moist but avoid overwatering. At this stage, strawberries are fragile, and a heavy hand can wash the seeds away. That’s why a spray bottle is your best friend.
Watching those tiny sprouts emerge is a magical moment—it feels like the garden is rewarding your patience.
Step 4: Nurturing Seedlings
After sprouting, the focus shifts to nurturing seedlings and transplanting them to their final growing location.
- Remove the humidity cover once the first leaves appear.
- Thin out weaker sprouts to give the strong ones room to grow.
- Provide consistent light (12–14 hours daily).
- Feed every 2 weeks with diluted organic fertilizer.
At this point, you’re training your strawberries to become hardy enough to thrive outdoors later.
Also Read: From Tea to Skincare: 8 Brilliant Ways to Use Rosemary Flowers
Step 5: Transplanting Outdoors
Once seedlings have at least three to four true leaves, begin hardening them off. This means gradually exposing them to outdoor air and light for a few hours daily until they adjust.
Then, carefully move them to raised beds or containers. Be gentle when nurturing seedlings and transplanting them to their final growing location—their roots are sensitive.
Strawberries prefer raised beds or large containers with good drainage. This prevents root rot and keeps the soil temperature stable.
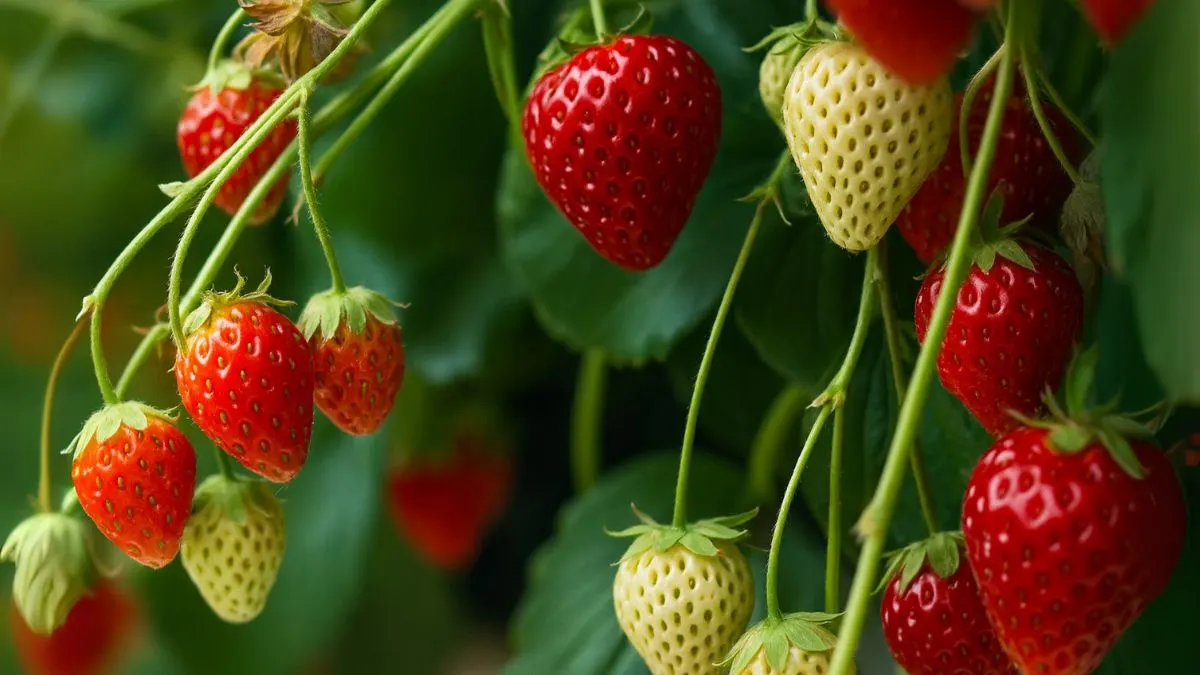
Step 6: Choosing the Right Variety
The biggest advantage of seed propagation is variety. Unlike nurseries, where you’re limited to what’s available, seeds let you grow any variety from seed.
- Alpine strawberries – Tiny but intensely sweet fruits.
- Day-neutral strawberries – Continuous harvests through the season.
- June-bearing strawberries – Large harvest in early summer.
Experimenting with different types can give you unique flavors and harvest times. In my case, alpine strawberries grown in partial shade turned out sweeter than sun-grown store varieties.
Care Tips for Strong Plants
Once outdoors, here’s how to care for your strawberries:
- Mulch around plants to conserve water and suppress weeds.
- Use compost or balanced fertilizer to support fruiting.
- Protect young plants from frost with row covers if winters are harsh.
A little care goes a long way. With the right setup, strawberries can produce fruit for 3–5 years from a single planting.
Common Mistakes to Avoid
- Skipping indoor sowing – Outdoor sowing rarely works due to fluctuating temperatures.
- Overwatering – Constantly soggy soil encourages fungus.
- Ignoring soil type – Forgetting that loose and well drained soil is best for germinating seeds often results in seed failure.
- Rushing transplanting – Moving seedlings too early weakens their chances.
Learning from these mistakes can save you weeks of lost effort.
Also Read: How to Sprout Avocados With Zero Tools
Seeds vs Nursery Plants
Factor |
From Seeds |
From Nursery Plants |
Cost |
Low |
Higher |
Variety |
You can grow any variety from seed |
Limited options |
Time to Fruit |
12–18 months |
6–12 months |
Experience |
Rewarding and educational |
Easier, less effort |
If you value the journey as much as the harvest, starting from seeds is unbeatable.
Growing strawberries from seeds is not just about fruit—it’s about the experience. From preparing the tools needed, ensuring that loose and well drained soil is best for germinating seeds, to patiently nurturing seedlings and transplanting them to their final growing location, every step brings you closer to a unique reward.
Yes, it takes more time compared to nursery plants. But when those first berries appear—sweeter, fresher, and truly yours—the wait feels worth it.
So grab your seed packet, trays, and soil, and begin this journey today. Whether in Canada, the U.S., or anywhere else, your strawberry adventure starts the moment you decide to plant that first tiny seed.


