Few flowering plants bring as much tropical charm as plumeria (also called frangipani). Known for their intoxicating fragrance and exotic blooms, plumerias are surprisingly easy to grow from cuttings if you follow the right steps. The good news is that you don’t need to be an expert gardener. Even beginners can enjoy lush, blooming plumeria plants in a few seasons by starting with the right technique.
This guide will show you exactly how to grow plumeria cuttings, covering when to take cuttings, how to prepare them, the best soil, and tips for stabilizing your plant until it establishes strong roots.
-
Choosing the Right Plumeria Cuttings
Your success begins with selecting the right material.
- Always choose healthy cuttings that are least 12 inches (30 cm) or longer.
- Ideally, your plumeria plant cuttings should be between 12 and 18 inches (31-46 cm.) long for optimal growth.
- Make sure the cutting is firm, disease-free, and taken from a mature plumeria branch.
When buying, look for UNWRAPPED cuttings so you can immediately inspect their condition. A dry, calloused base indicates it’s ready for planting.
-
Best Time to Take Cuttings
Timing is everything when learning how to grow plumeria cuttings.
- The best time is during late spring or early summer when the plant is actively growing.
- Avoid taking cuttings in cold weather, as plumerias prefer warmth for root development.
In tropical countries, you can root plumeria nearly year-round, but in Canada and the USA, wait until the weather is consistently warm.
Also Read: These 3 Houseplants Practically Grow Overnight
-
Preparing the Cuttings
Before planting, preparation is key:
- Trim leaves and flowers so the plant can focus energy on root growth.
- Allow the cut end to dry for 5–7 days until it forms a callus. This prevents rotting.
- Optionally, dip the base in rooting hormone to encourage faster root development.
Personal tip: I’ve had better results when sealing the top end of the cutting with wax. This prevents moisture loss and fungal infections.
-
Best Soil for Plumeria Cuttings
Plumerias don’t like to sit in soggy soil. For best results:
- Use a well-draining soil mix—a blend of cactus soil, perlite, and sand works well.
- If planting directly in pots, ensure they have drainage holes.
- For garden planting, mix compost with sandy soil for improved aeration.
Remember, the best soil for plumeria cuttings is one that stays slightly moist but never waterlogged.
-
Planting Methods: Water vs Soil
You can root plumeria in either water or soil, but soil is the most reliable method.
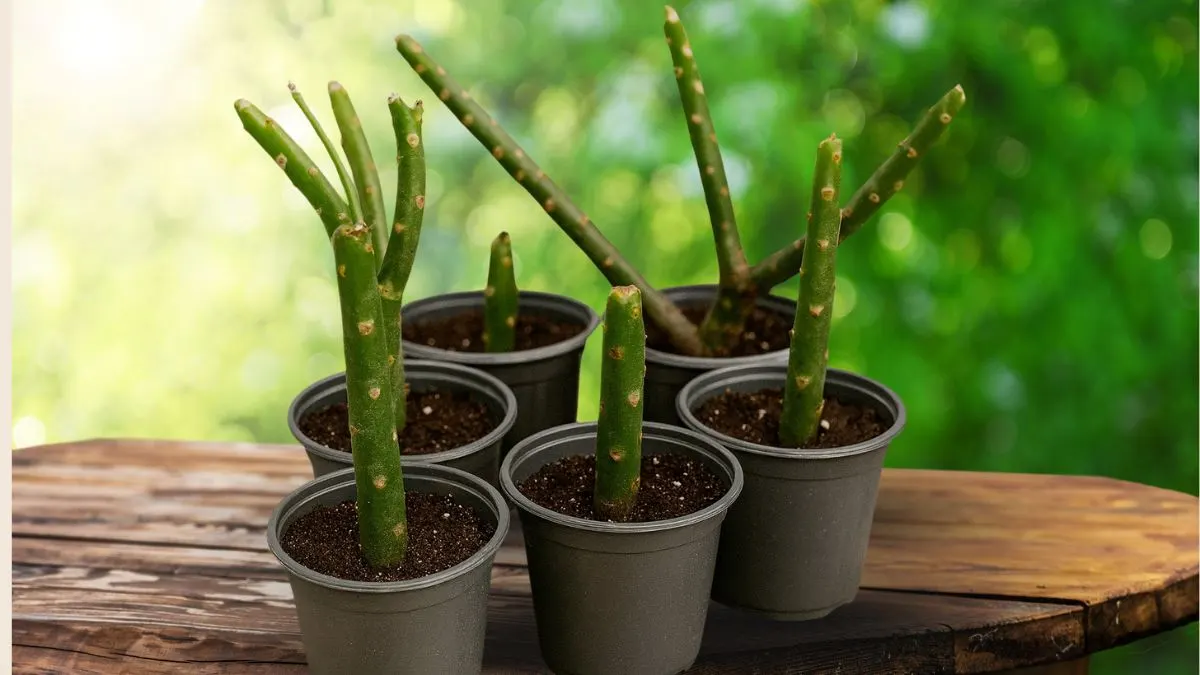
- In Soil: Insert the calloused end about 3–4 inches deep. Water lightly, just enough to keep the soil damp.
- In Water: Place the cutting in a glass of water, but change it every few days to avoid bacterial buildup.
Soil-grown cuttings usually develop stronger root systems compared to water-grown ones.
Also Read: Fresh Food in Mason Jars
-
Staking and Stabilizing Your Cuttings
Plumeria cuttings are top-heavy and may tip over before their roots anchor. This is where support is essential.
Use bamboo stakes tightened with plastic ties to stabilize the potted cutting. Make sure the tie isn’t too tight—it should hold the stem upright while allowing natural growth.
This step is especially crucial if you live in windy areas or are starting your plumeria outdoors.
-
Caring for Your Plumeria Cutting
Once planted, here’s how to ensure success:
- Place the pot in full sun or at least 6 hours of direct sunlight daily.
- Water sparingly. Overwatering is the number one reason cuttings fail.
- Don’t fertilize until you see signs of new leaf growth, usually within 6–8 weeks.
Plumerias are hardy, but patience is key. Growth may be slow in the beginning, but once roots establish, they flourish quickly.
-
Growth Stages of Plumeria Cuttings
Understanding growth stages helps you track progress:
- Dormancy (first few weeks): The cutting looks unchanged while roots form below the soil.
- Sprouting: Small green buds appear at the top of the cutting.
- Leaf Development: Leaves grow rapidly, signaling strong root growth.
- Flowering: Within 1–2 years, your plumeria may reward you with its first blooms.
I still remember the excitement when my first plumeria cutting bloomed after a year. The fragrance filled my garden, making every step worthwhile.
Also Read: The Secret to Growing Strawberries at Home
Plumeria Cutting Care
Step |
Key Action |
Why It Matters |
Selecting |
Healthy cuttings at least 12 inches |
Ensures strong roots |
Timing |
Late spring or summer |
Warmth promotes growth |
Preparation |
UNWRAPPED, calloused cutting |
Prevents rot |
Soil |
Best soil for plumeria cuttings (well-drained) |
Avoids root rot |
Stabilizing |
Bamboo stakes tightened with plastic ties |
Keeps plant upright |
Growing plumeria from cuttings isn’t just easy—it’s incredibly rewarding. With the right care, your plumeria plant cuttings should be between 12 and 18 inches (31-46 cm.) long, placed in the best soil for plumeria cuttings, and supported with bamboo stakes tightened with plastic ties for stability. Whether in tropical climates or on a sunny balcony in the USA or Canada, plumerias thrive when given warmth and patience.
So, grab those healthy cuttings that are least 12 inches (30 cm) or longer and start your plumeria journey today. Soon, you’ll enjoy their exotic blooms and intoxicating fragrance right at home.


