Climbers plants like money plant, philodendrons, and monsteras add instant beauty to homes and gardens. But for them to grow strong, lush, and upright, they often need support. That’s where moss sticks come in. These poles replicate a plant’s natural habitat by providing both structure and moisture. In this article, I’ll show you how to make your own moss stick, set it up, and train your climbers to thrive on it.
Why Moss Sticks?
- They mimic the natural tree bark environment climbers love.
- Moss retains water, keeping aerial roots hydrated.
- They provide vertical growth support, saving space indoors and outdoors.
- They create fuller, healthier plants with larger leaves.
When I first used a moss stick for my monstera, I was amazed at how quickly it began climbing upward, producing bigger and more vibrant leaves than before.
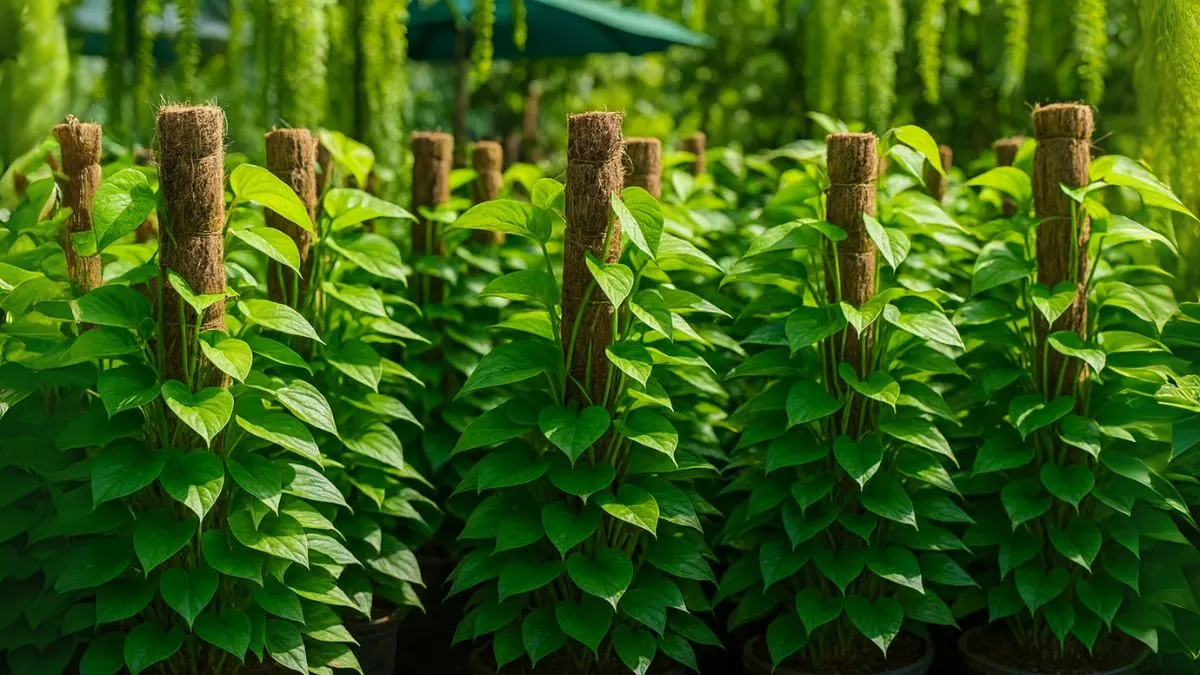
Step 1: Make the Moss Stick
The first step is building a sturdy pole for your climber.
- Make the pole using a wooden stake, wire mesh, and sphagnum moss, then plant your climbing plant next to it.
- The wooden stake acts as the backbone.
- Wrap the wire mesh around it to hold the moss in place.
- Place the moss around the pole evenly and secure with twine or ties.
DIY moss sticks are inexpensive and customizable in height, unlike store-bought versions.
Also Read: 5 Stunning Succulents That Can Survive Snow & Frost
Step 2: Choose the Right Spot
Light is critical for climbers.
- Place the plant somewhere where there is enough sun but no harsh or direct sunlight.
- Indoor climbers do well near east-facing or north-facing windows.
- Outdoors, partial shade works best, especially during hot afternoons.
Step 3: Planting the Climber
- Position the moss stick in the pot before planting so it stays firm.
- Place your climber close to the base of the stick so roots can attach quickly.
- Fill the pot with well-draining soil mixed with compost.
For my money plant, I used a large terracotta pot with organic compost. Within weeks, the roots were happily climbing the moss stick.
Step 4: Training the Plant
Climbers need gentle guidance at first.
- Tie young stems loosely to the moss stick with soft twine.
- Mist the moss regularly to encourage aerial roots to grip.
- As the plant grows, it will attach naturally and climb upward.
Step 5: Watering and Care
Moss sticks need consistent moisture for best results.
- Mist the moss daily or every other day to keep it damp.
- Water the soil when the top inch feels dry.
- Fertilize monthly with a balanced liquid fertilizer for healthy growth.
Plants That Love Moss Sticks
Some popular choices across Canada, the USA, and worldwide include:
- Monstera deliciosa
- Philodendrons
- Pothos (Money plant)
- Syngonium
- Betel leaf plant
All these plants respond beautifully to the vertical support and moisture-retaining qualities of moss sticks.
Also Read: Sanjeevani Plant: The Ancient Herb That Could Save Lives?
Key Requirements for Growing Climbers on Moss Sticks
Step |
Requirement |
Stick Preparation |
Make the pole using a wooden stake, wire mesh, and sphagnum moss, then plant your climbing plant next to it |
Moss Placement |
Place the moss around the pole securely |
Light |
Place the plant somewhere where there is enough sun but no harsh or direct sunlight |
Watering |
Mist moss daily; water soil when dry |
Plants |
Monstera, Philodendron, Pothos, Syngonium, Betel leaf |
Common Mistakes to Avoid
- Using untreated wood that rots quickly.
- Forgetting to mist the moss, which causes roots to dry out.
- Placing plants in direct, harsh sun that scorches leaves.
- Tying stems too tightly, damaging growth.
Personal Experience
When I tried growing a pothos on a moss stick, I didn’t mist the moss regularly. As a result, the aerial roots dried up and the plant failed to climb properly. After I started misting every other day, the difference was clear—the plant began attaching itself strongly and grew twice as fast.
Moss sticks are a simple but powerful tool to grow stunning, healthy climbers. With this method, your indoor or outdoor climbers will flourish into lush, eye-catching displays.


