Kale has become a superfood loved by health enthusiasts across the world. Whether you enjoy it in salads, soups, smoothies, or sautéed with garlic, its versatility makes it a must-have in your kitchen garden. The best part? Kale is one of the easiest vegetables to grow and can thrive in both cool and warm climates.
When I first started my kitchen garden, kale was among my first successful crops. I had little space, just a few pots on my balcony, yet the plants thrived and gave me continuous harvests for months.
Why Grow Kale?
Kale is packed with nutrients—Vitamin K, Vitamin C, calcium, antioxidants, and fiber. It’s often called a powerhouse green because of its health benefits, such as improving digestion, boosting immunity, and supporting bone strength.
From a gardener’s perspective, kale is:
- Easy to grow for beginners.
- Resilient to different weather conditions.
- A continuous producer if harvested correctly.
- Suitable for both containers and large garden beds.
Choosing the Right Variety
Before learning, decide which type suits your taste and garden space.
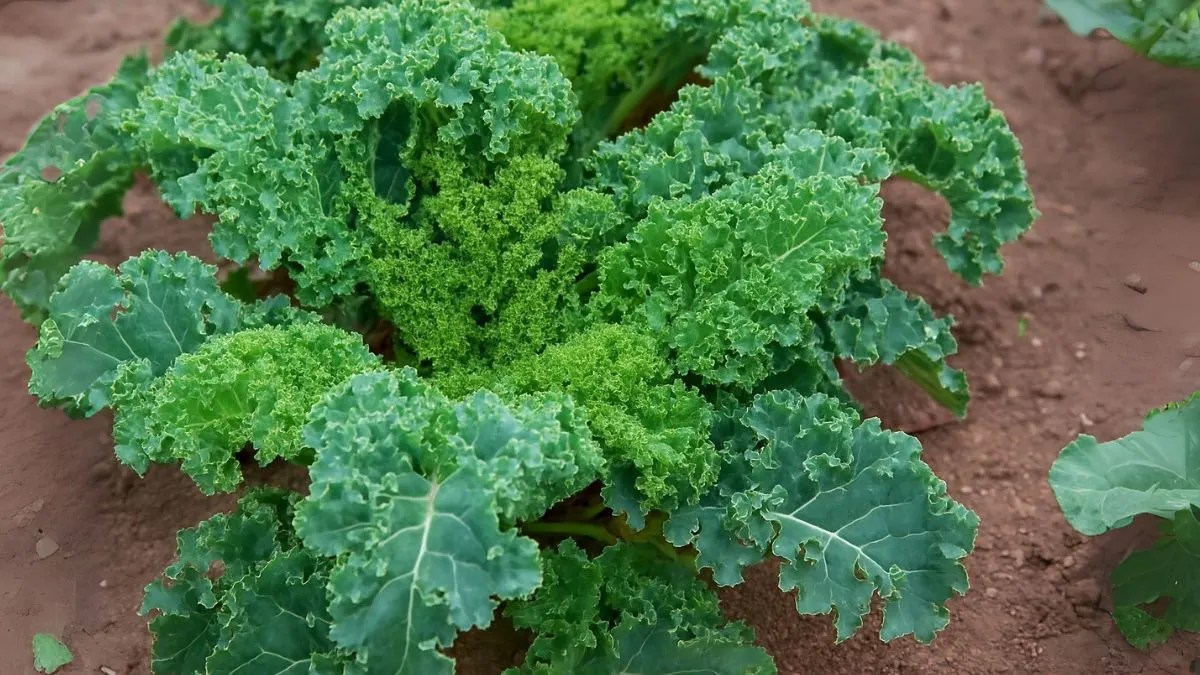
- Curly Kale – Classic variety with ruffled leaves, great for salads and chips.
- Lacinato Kale (Dinosaur Kale) – Dark green, smoother leaves, perfect for soups.
- Red Russian Kale – Tender, colorful leaves with a slightly sweet flavor.
- Siberian Kale – Cold-hardy, making it ideal for northern regions like Canada.
Each variety has its own texture and flavor, so you can experiment based on what you prefer in your meals.
Also Read: Everything You Need to Keep Your Moon Valley Pilea Thriving
Soil Preparation
It thrives in rich, fertile, and well-draining soil. Aim for a soil pH between 6.0 and 7.5. Mix in compost or well-rotted manure before planting for better nutrition.
If you’re growing in pots, choose a high-quality vegetable potting mix. Loose soil helps roots spread easily and prevents waterlogging.
Planting Kale
There are two main ways to grow kale:
- Direct Sowing
-
- Plant seeds about 1/2 inch deep directly in the soil.
- Space plants 12–18 inches apart to give them room to grow.
- Keep the soil moist until seedlings emerge.
- Transplanting Seedlings
-
- Start seeds indoors 4–6 weeks before the last frost date.
- Move them outdoors once they have 3–4 true leaves.
- This method is common in colder climates like the USA and Canada, where growing seasons are shorter.
Sunlight Requirements
It prefers full sun but can tolerate partial shade. Ideally, place your plants where they receive at least 6 hours of sunlight daily. In hot climates, partial shade helps prevent the leaves from turning bitter.
Watering Needs
It requires consistent watering. Keep the soil evenly moist but not waterlogged. Mulching around the base of plants helps retain soil moisture and suppress weeds.
When I grew kale on my balcony, I made the mistake of letting the soil dry out too often. The leaves turned tough and bitter. Once I adjusted to a regular watering schedule, the plants bounced back beautifully.
Also Read: Kokedama Plants: A Soil Ball, Some Moss, and a Whole Lot of Zen
Fertilization
Feed kale every 4–6 weeks with a balanced organic fertilizer or compost tea. Nitrogen-rich fertilizers encourage leafy growth, which is what you want for kale.
Avoid over-fertilizing, as this may cause excessive leaf production but compromise taste.
Container Gardening with Kale
If you don’t have a backyard, you can easily grow it in pots. Choose a container at least 12 inches deep with proper drainage holes.
Fill it with nutrient-rich potting mix and place it in a sunny location. Container-grown kale is easy to manage and perfect for urban gardeners.
Pest and Disease Management
While it is generally hardy, it can attract pests like aphids, cabbage worms, and flea beetles.
Natural remedies include:
- Spraying neem oil.
- Using row covers.
- Companion planting with herbs like basil or mint to deter insects.
Diseases like powdery mildew can be prevented by ensuring good air circulation and avoiding overhead watering.
Harvesting Kale
One of the best things about kale is its continuous harvest. Start picking leaves when they’re about the size of your hand. Always harvest the outer leaves first, leaving the central bud to keep producing new growth.
You can enjoy fresh kale for several months, especially if you plant in succession.
Also Read: Why Herbalists Love Hawthorn—And How You Can Grow It Too
Quick Guide to Growing Kale
Factor |
Requirement |
Soil Type |
Fertile, well-draining, compost-rich soil |
Sunlight |
6+ hours daily (partial shade in hot areas) |
Spacing |
12–18 inches apart |
Watering |
Keep soil evenly moist, mulch recommended |
Container Size |
At least 12 inches deep |
Harvest Time |
55–75 days after sowing |
Personal Experience
In my first attempt, I planted curly kale in a 12-inch pot with compost-rich soil. Within eight weeks, I had enough leaves to make kale chips. The plants lasted through the fall, and with a little protection, I even enjoyed harvests during early winter. That’s when I realized why it is such a favorite among home gardeners—it’s hardy, nutritious, and keeps giving back.
Whether you’re in a small apartment with a balcony or a home with a backyard, kale adapts well and thrives with minimal effort. Start with just a few plants and see how quickly they become a staple in your kitchen.
So, grab some seeds, prepare your soil, and begin your journey with kale—it’s one of the healthiest and easiest vegetables you can grow at home.


