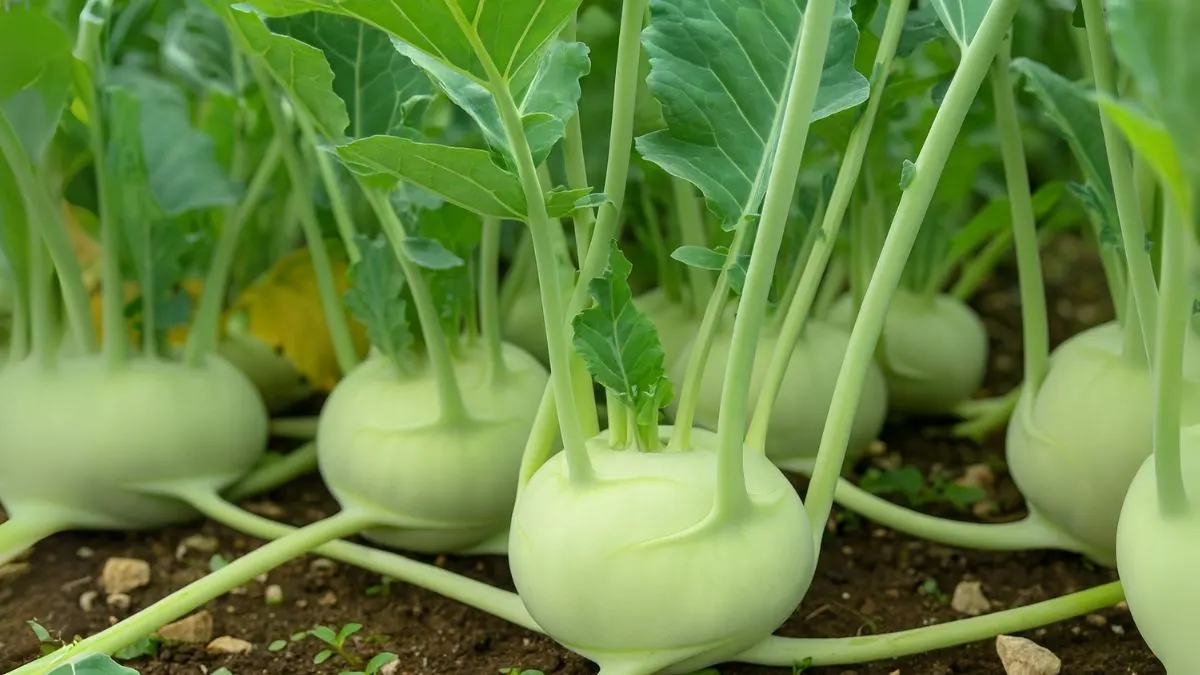
If you’re looking for a unique and rewarding vegetable to add to your garden, Noolkol (also called Knol khol or Kohlrabi) is an excellent choice. Known for its bulbous stem and crisp texture, it’s a staple in Indian kitchens and gaining popularity in Canada, the USA, and Europe for its taste and versatility.
The good news? Growing it at home is surprisingly simple. With the right soil, sunlight, and watering routine, anyone can cultivate Noolkol—even beginners. In this article, I’ll walk you through everything you need to know about how to grow Noolkol seeds, along with some personal gardening tips I’ve learned over the years.
Why Grow Noolkol in Your Garden?
Noolkol, or Kohlrabi, belongs to the brassica family, the same group as cabbage and broccoli. Its crisp stem can be eaten raw in salads or cooked in stews, curries, and stir-fries. It’s rich in vitamin C, potassium, and dietary fiber, making it both delicious and healthy.
Another reason gardeners love it? It matures quickly and is fairly resilient, making it an excellent choice for home gardens.
Step 1: Choosing the Right Time
Timing is crucial when planting this crop. Experts recommend that Noolkol grows well under full sunlight in winters, as cooler conditions improve flavor and texture. In regions like Canada and the USA, the best time is early spring or late summer for a fall harvest.
Step 2: Preparing the Soil
Like most brassicas, Knol khol require evenly moist soil that is rich in organic matter. Loosen the soil to at least 8 inches deep and enrich it with compost. A slightly acidic to neutral pH (6.0–7.5) works best.
If your soil tends to dry out quickly, mulching is a great way to retain moisture while also suppressing weeds.
Also Read: Build Strength Naturally With This Iron-Rich Powerhouse Vegetable
Step 3: Sowing the Seeds
When it comes to planting, you can sow your Noolkol seeds directly into the garden rather than starting indoors. This ensures the roots develop without disturbance.
- Depth: Sow seeds approximately 5 mm (1/4”) deep.
- Spacing: Keep 6–8 inches between seeds for proper bulb development.
- Row Spacing: Maintain about 12 inches between rows.
One mistake I made the first time was planting seeds too close together. The result? Small, underdeveloped bulbs. Proper spacing is key.
Step 4: Sunlight Needs
Kohlrabi plants are best grown in full sun or part shade, but if you want bigger, sweeter bulbs, aim for full sunlight. In winter, when the sunlight is gentler, the plants thrive and develop their signature crisp flavor.
Step 5: Watering Routine
Water plays a vital role in getting those juicy, tender bulbs. Knol khol require evenly moist soil, so water regularly, especially during dry spells. However, avoid waterlogging, as that may cause root rot.
From my personal experience, watering lightly every 3–4 days in cool weather and every alternate day in summer works well.
Step 6: Fertilization
Though not heavy feeders, Noolkol benefits from nitrogen-rich fertilizers in the early stages to encourage leafy growth. Later, switch to a balanced fertilizer to promote bulb formation. Compost tea or organic liquid fertilizers are excellent eco-friendly options.
Step 7: Thinning and Maintenance
Once seedlings are about 3 inches tall, thin them to prevent overcrowding. Healthy air circulation ensures disease resistance. Keep the soil weed-free, as weeds compete for nutrients.
Step 8: Harvesting
The best time to harvest is when bulbs are 2–3 inches in diameter. If you let them grow too large, they become woody and lose tenderness. With proper care, you can start harvesting Noolkol within 6–8 weeks of sowing.
Also Read: Want Fruitful Apricot Trees? Master These 5 Tips First
Common Problems and Solutions
Problem |
Cause |
Solution |
Small Bulbs |
Crowded planting |
Thin seedlings, provide spacing |
Woody Texture |
Late harvest |
Harvest when bulbs are 2–3 inches |
Yellow Leaves |
Overwatering or poor soil |
Improve drainage, add compost |
Pests (aphids, cabbage worms) |
Common in brassicas |
Use neem oil spray or row covers |
Benefits of Growing Noolkol
- Nutritional Value: High in vitamins, minerals, and antioxidants.
- Quick Maturity: Ready to harvest in under two months.
- Culinary Versatility: Can be eaten raw, roasted, or added to soups.
- Cold Tolerance: Unlike many vegetables, it thrives in cooler weather.
Personal Gardening Experience
When I first tried growing Noolkol in my backyard during late winter, I wasn’t sure if it would handle the cold nights. To my surprise, the plants not only survived but thrived. The bulbs grew crisp and sweet, and harvesting them fresh for salads felt rewarding. I also found that Noolkol grows well under full sunlight in winters, making it a perfect cool-season crop.
Factor |
Requirement |
Seed Depth |
5 mm (1/4”) deep |
Sunlight |
Full sun or part shade |
Watering |
Evenly moist soil |
Harvest Size |
2–3 inches diameter |
Best Season |
Winters (cool climate) |
Whether you’re in India, Canada, or the USA, this crop is an excellent addition to your seasonal garden. With minimal care and patience, you’ll soon enjoy crisp, homegrown Noolkol in your favorite dishes.


