There’s a special satisfaction in snipping herbs and greens right from a glass jar. It’s tidy, portable, and surprisingly productive. With the right setup, a bright shelf becomes a mini‑garden that delivers weekly flavor: basil for pasta, oregano for eggs, mint for teas, and quick microgreens for crunch. The best part? Fresh food grown in Mason jars is not only possible—it’s repeatable.
Mason Jar Growing: Two Reliable Methods
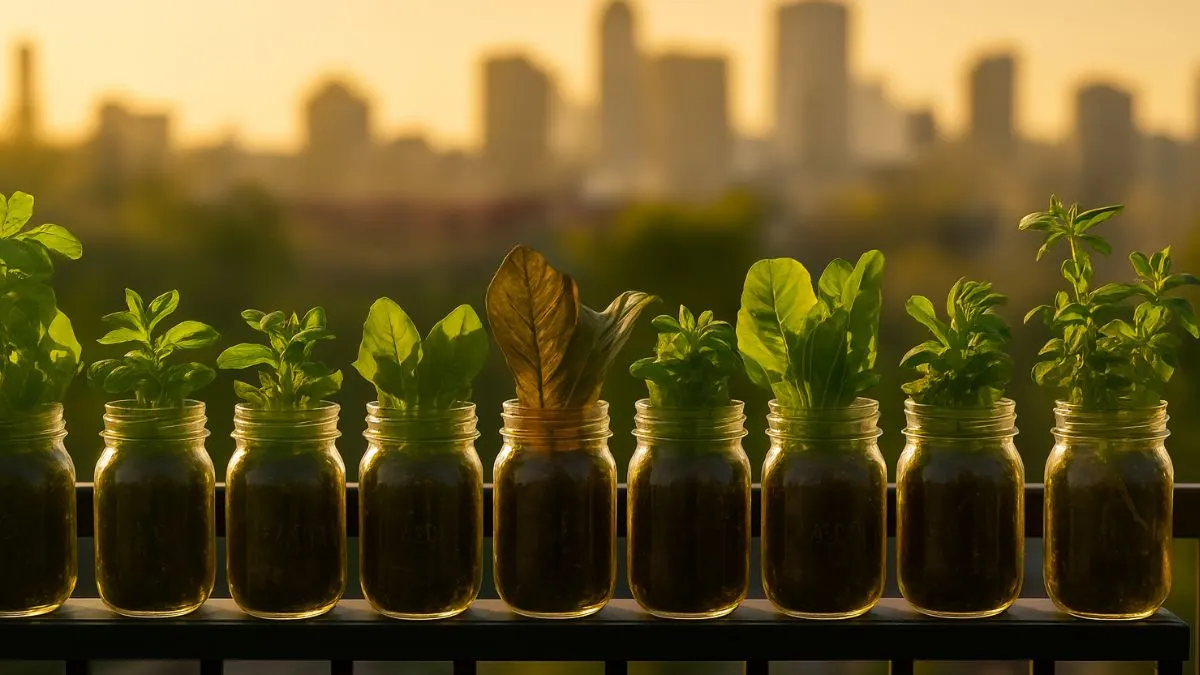
There are two proven ways to grow in jars indoors. Pick one—or run both—for a steady pipeline of harvests.
- Hydroponic jars (passive): A pump‑free approach often called the Kratky method. A net pot sits in the jar mouth, clay pebbles hold a seedling, and a nutrient solution fills the jar just high enough to touch the base of the starter plug. As roots grow, they reach down to the solution while the upper section forms “air roots” in the gap above. To prevent algae, paint or sleeve the jar so light doesn’t hit the nutrient water. Keep light strong, check levels weekly, and top up nutrients as needed.
- Soil‑in‑jar (microgreens): For microgreens and baby greens, fill about three‑quarters of the jar with a fine, moist potting mix. Sow densely, cover lightly, and keep evenly moist. Most microgreens are ready in 7–14 days, making this an ideal quick harvest between bigger projects.
What Grows Best in Mason Jars
Not every plant suits a jar, but these do exceptionally well with good light and consistent care.
1. Basil
Basil loves bright light and steady moisture. In hydro jars, it grows fast on a balanced nutrient solution and at least 6 hours of direct light (supplemental LEDs boost results). Pinch above leaf nodes to keep plants bushy and delay flowering. Start from seed in a small cube or transplant a nursery start into a net pot anchored with pebbles. Keywords: Basil in Mason jars, Hydroponic basil, Pinch for bushiness.
2. Mint
Mint roots readily in water—perfect for jars. Take a healthy sprig, strip lower leaves, and place in fresh water; roots typically appear within 1–2 weeks. Refresh water often to keep it oxygenated. Once rooted, pot up in soil or transition to hydro. Jars also prevent mint from taking over other containers. Keywords: Mint cuttings, Water propagation.
3. Oregano
Compact and dependable indoors. Grow in hydro or soil with strong light, and harvest lightly but often. Frequent cutting keeps leaves tender and flavor concentrated. Keywords: Oregano hydroponics, Indoor oregano.
Also Read: Geranium Watering Secrets: Keep Them Blooming All Season Long
4. Watercress
A natural fit for water‑forward systems. In a hydro jar, watercress thrives with clean water, balanced nutrients, and bright light. Clip frequently for salads and sandwiches; refresh solution regularly to avoid stagnation. Keywords: Hydroponic watercress.
5. Lettuces and Spinach
Outstanding as baby leaves. Use hydro jars or soil‑filled jars for cut‑and‑come‑again harvesting. Sow densely, thin lightly, and harvest when tender. Keep temperatures cool and light bright to maintain crisp texture and mild flavor. Keywords: Baby leaf lettuce, Indoor spinach.
6. Radish, Turnip, Beet, Kohlrabi (as Microgreens)
Bulb crops demand space, so grow them as microgreens in jars. Add 1–2in of moist soil, sow thickly, and give a short blackout to encourage strong germination. Move to bright light after sprouting and harvest in 7–14 days by snipping above the soil line. Expect intense flavors and vibrant colors. Keywords: Radish microgreens, Beet microgreens, Kohlrabi microgreens.
7. Dandelion
Underrated and nutrient‑dense. Grow in soil jars for baby leaves; harvest young for a pleasant, balanced bitterness. Keep moisture even and provide bright light. Keywords: Edible dandelion greens.
8. Tomatoes (Micro/Dwarf)
Possible but advanced. Dwarf or micro‑determinate tomatoes can be trialed in larger glass vessels or converted jar planters, but they need strong supplemental lighting and careful nutrient management. For most beginners, start with herbs and microgreens, then experiment with micro tomatoes later. Keywords: Micro tomatoes, Indoor tomato jars.
Also Read: Bull Thistle: The Spiky Weed with Surprising Health Benefits
Hydro Jar Setup: Quick Start
- Jar and lid: Use wide‑mouth Mason jars; fit a net pot into the ring for a secure seat.
- Block the light: Paint the jar or add an opaque sleeve to prevent algae.
- Nutrients and water: Mix a balanced hydroponic solution with filtered water; keep pH in a plant‑friendly range.
- Waterline: Fill until solution just touches the base of the starter plug—do not submerge it entirely.
- Planting: Set your seedling, stabilize with clay pebbles, and place in bright light.
- Maintenance: Let levels drop to create an air gap, then top up. Refresh solution periodically.
Soil‑In‑Jar for Microgreens: Fast Cycle
- Fill and sow: Add 1–2in of fine, moist potting mix and sow densely.
- Blackout: Use a lid or cover for a brief blackout to boost germination.
- Light and air: Move to bright light once sprouted; ensure airflow to prevent damping‑off.
- Harvest: Snip in 7–14 days when cotyledons and first true leaves are lush.
Light, Placement, and Timing
- Light intensity: Most culinary herbs need at least 6 hours of direct sun; 12–14 hours under LED produces compact, flavorful growth.
- Distance and heat: Keep LEDs close enough to prevent stretch but far enough to avoid heat stress—follow the light’s guidance.
- Staggered sowing: For continuous harvests, start new jars weekly. For example, begin hydro basil and oregano while sowing radish microgreens every few days.
Care and Troubleshooting
- Algae: Always block light to the nutrient solution. If algae appears, clean the jar and refresh the mix.
- Slow growth: Increase light, refresh nutrients, check pH, and ensure the air gap lets roots breathe.
- Wilting microgreens: Improve airflow, avoid overwatering, and harvest on time.
- Off flavors in greens: Keep temperatures cooler and moisture steady to reduce bitterness.
A Simple Weekly Routine
- Top shelf: hydro jars for basil and oregano, with a clear-water glass rooting a mint sprig.
- Lower shelf: soil jars cycling radish and beet microgreens. Once a week, reseed microgreens, top up hydro nutrients, and harvest what’s ready. It takes minutes and delivers fresh flavor daily.
Also Read: Wild Lettuce: Nature’s Calm Healer and Wart Fighter
Who This Works For
This jar‑based approach scales easily across apartments and houses in any bright spot—kitchen shelves, windowsills, or under a compact grow light. It’s suitable year‑round in Canada, the USA, and beyond, as long as light and basic care are provided.
Tiny Jars, Big Flavor
Mason jars make indoor growing accessible and satisfying. Choose soil for quick microgreens, use a passive hydro setup for repeatable herb production, and keep light, cleanliness, and nutrients on point. The payoff is immediate: basil for pesto, oregano for sauces, mint for drinks, watercress for sandwiches, and a colorful rotation of microgreens—all within arm’s reach.


